
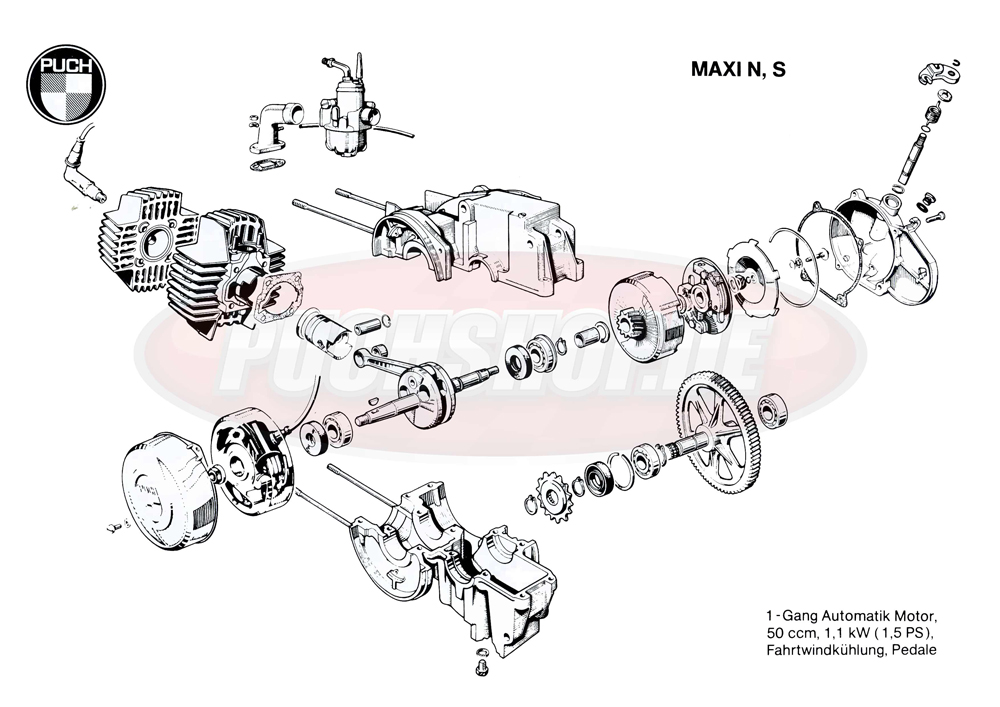
Rebuilding a Puch E50 engine
Rebuilding a Puch E50 engine requires clean working, correct tools, and precise assembly. This step-by-step guide explains how to rebuild the Puch E50 engine block, install the crankshaft, install bearings, oil seals, and seal the crankcase correctly. A correct Puch E50 rebuild ensures reliable performance, good compression, and long engine life.
Order your Puch E50 rebuild kit, bearings, oil seals, and tools at PuchShop and start rebuilding your Puch E50 engine today.
- How a Puch E50 two-stroke engine works
- Tools and parts for rebuilding a Puch E50 engine
- Puch E50 bearing sizes and torque specifications
- Rebuilding a Puch E50 engine step by step
- Puch E50 engine case restrictions for 70cc and 74cc cylinders
- Common Puch E50 rebuild mistakes
- How to recognize air leaks in a Puch E50 engine
- After rebuilding a Puch E50 engine
- FAQ: Rebuilding a Puch E50 engine
- Conclusion
How a Puch E50 two-stroke engine works
The Puch E50 is a two-stroke engine that uses the crankcase to control the fuel-air mixture. The crankshaft seals and crankcase must be airtight to maintain correct compression. Air leaks cause poor performance, overheating, and engine damage.
Correct crankshaft alignment, good bearings, and correct oil seal installation ensure smooth engine operation. A well-sealed crankcase is required for a reliable Puch E50 rebuild.
Tools and parts for rebuilding a Puch E50 engine
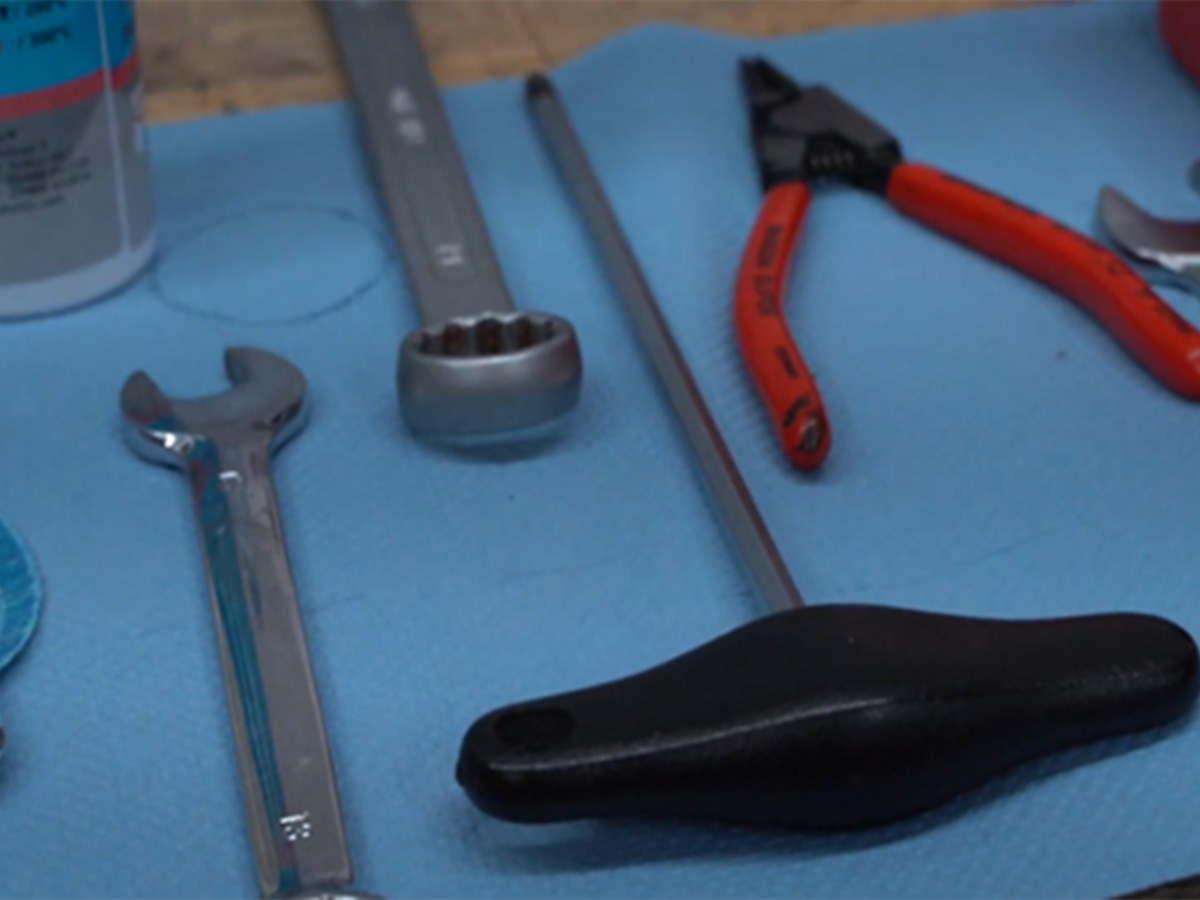
Prepare all tools and parts before rebuilding a Puch E50 engine. Correct tools improve assembly accuracy and prevent engine damage. Use a torque wrench, circlip pliers, bearing puller, and feeler gauge. Use brake cleaner for degreasing, two-stroke oil for lubrication, liquid gasket for sealing, and Loctite 243 for critical bolts.
Install new Puch E50 bearings, new Puch E50 oil seals, new circlips, and new gaskets during every rebuild. Use a complete Puch E50 rebuild kit to ensure correct parts and dimensions.
Order the correct Puch E50 rebuild kit and tools before starting the rebuild.
Puch E50 bearing sizes and torque specifications
Correct specifications ensure a reliable Puch E50 rebuild and prevent engine damage.
- Crankshaft bearings: 6202 C3
- Oil seals: 17 × 40 × 7 mm
- Crankcase bolt torque: 10 Nm
- Sealant: Liquid gasket
- Threadlocker: Loctite 243
Always verify specifications for your specific Puch E50 engine model before assembly.
Rebuilding a Puch E50 engine: step-by-step
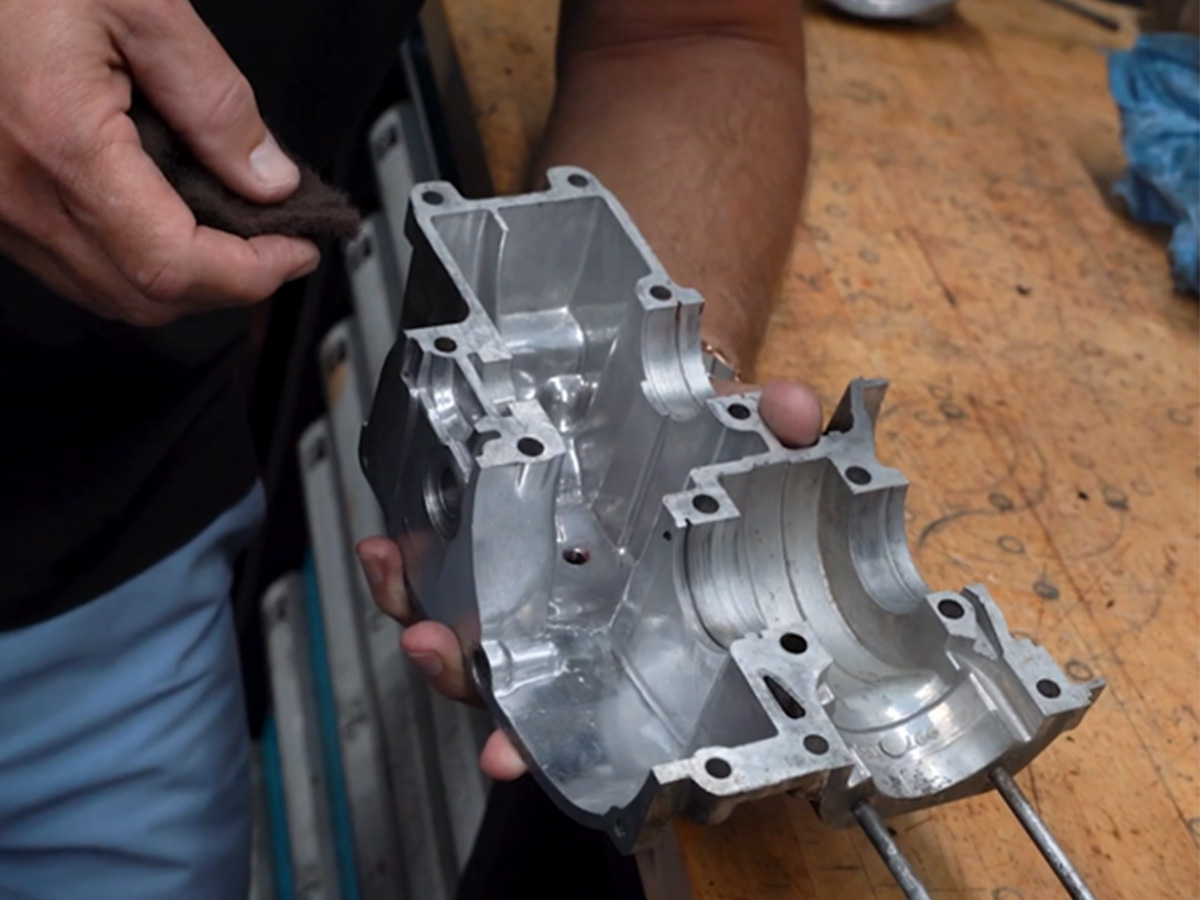
Step 1: Cleaning and preparation
Proper preparation determines the quality of a Puch E50 rebuild. Remove all bolts and split the engine case. Clean the engine with brake cleaner and degrease all sealing surfaces. Remove old gasket material so the new sealant adheres correctly.
Making sure everything is clean will help prevent air leaks and reduce engine wear.
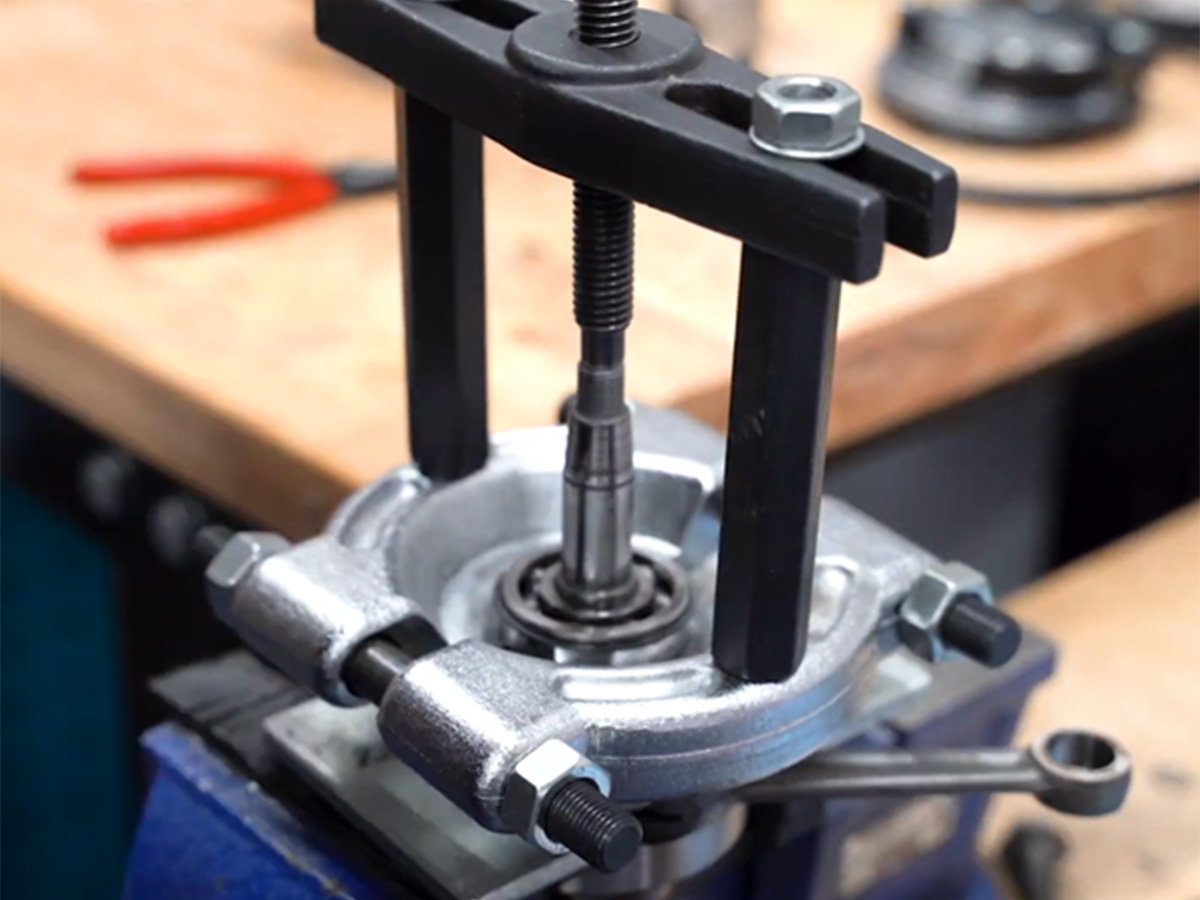
Step 2: Removing old engine parts
Replace bearings, oil seals, circlips, and gaskets during every Puch E50 rebuild. Remove old seals and circlips and remove the bearings with a bearing puller. Inspect the crankshaft for wear and play.
New parts ensure correct crankshaft alignment and engine reliability.
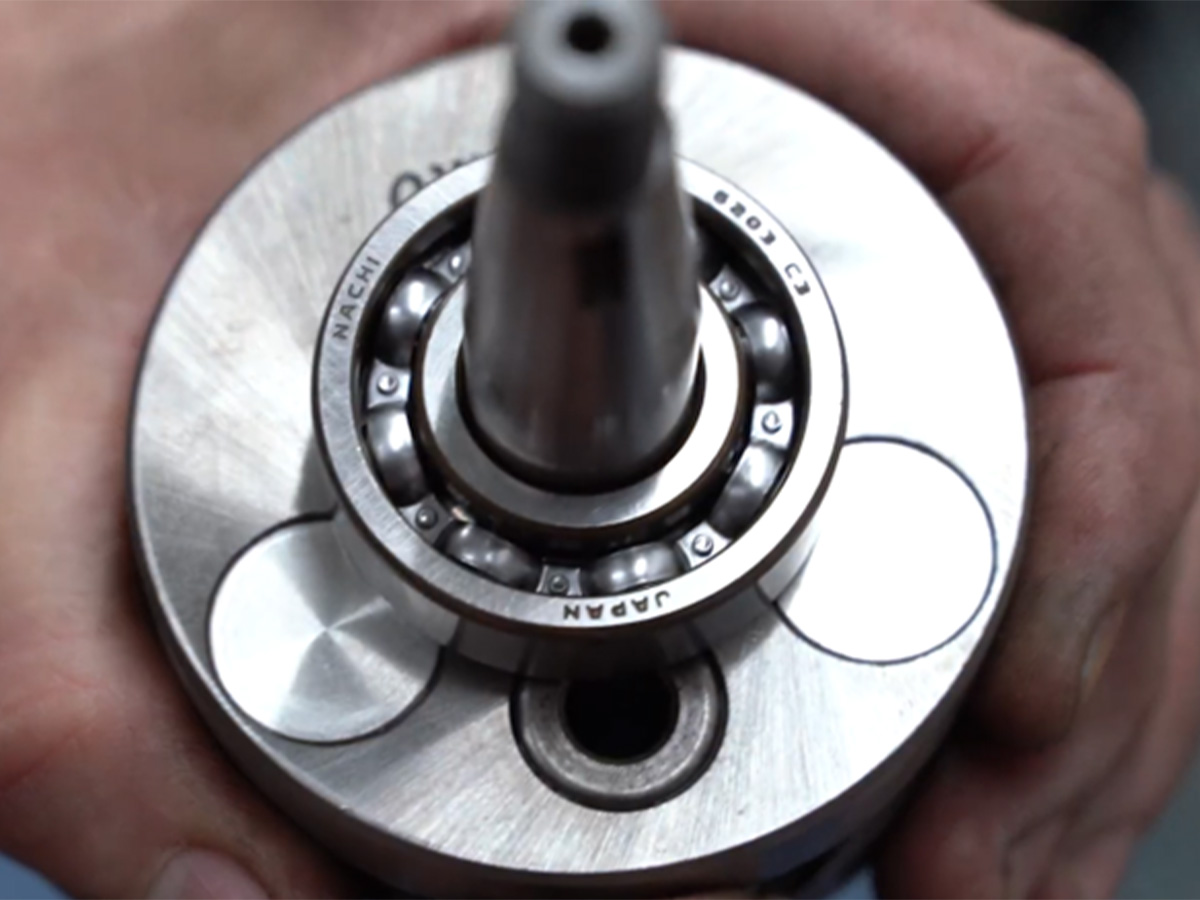
Step 3: Installing Puch E50 bearings
Heat the bearings to 212°F – 230°F (100°C – 110°C) before installation. Heating expands the bearing so it slides into the crankcase easily. Press the bearing into position and allow it to cool before installing the crankshaft.
Install bearings with the markings facing outward.
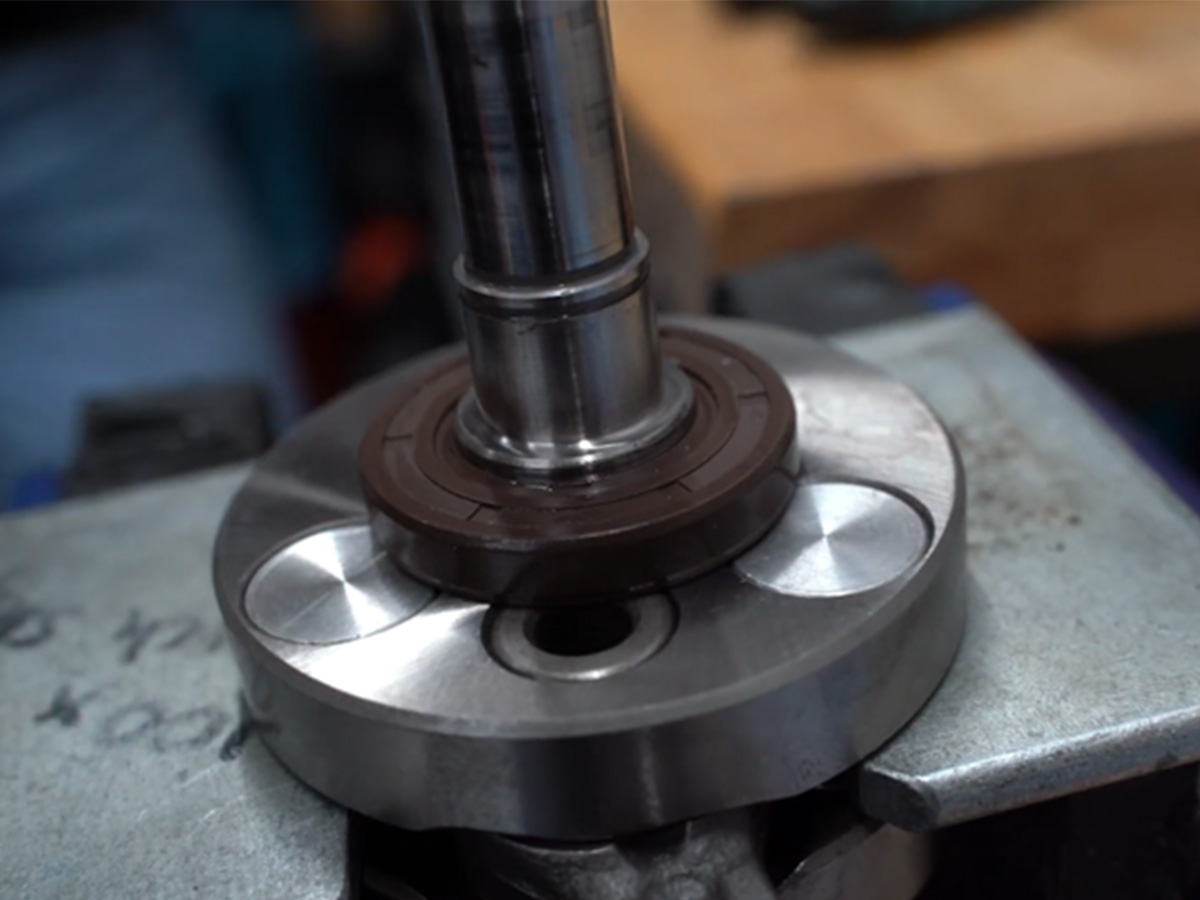
Step 4: Installing Puch E50 oil seals
Lubricate the oil seal before installation. Install the seal with the open side facing inward. Correct installation prevents air leaks and starting problems.
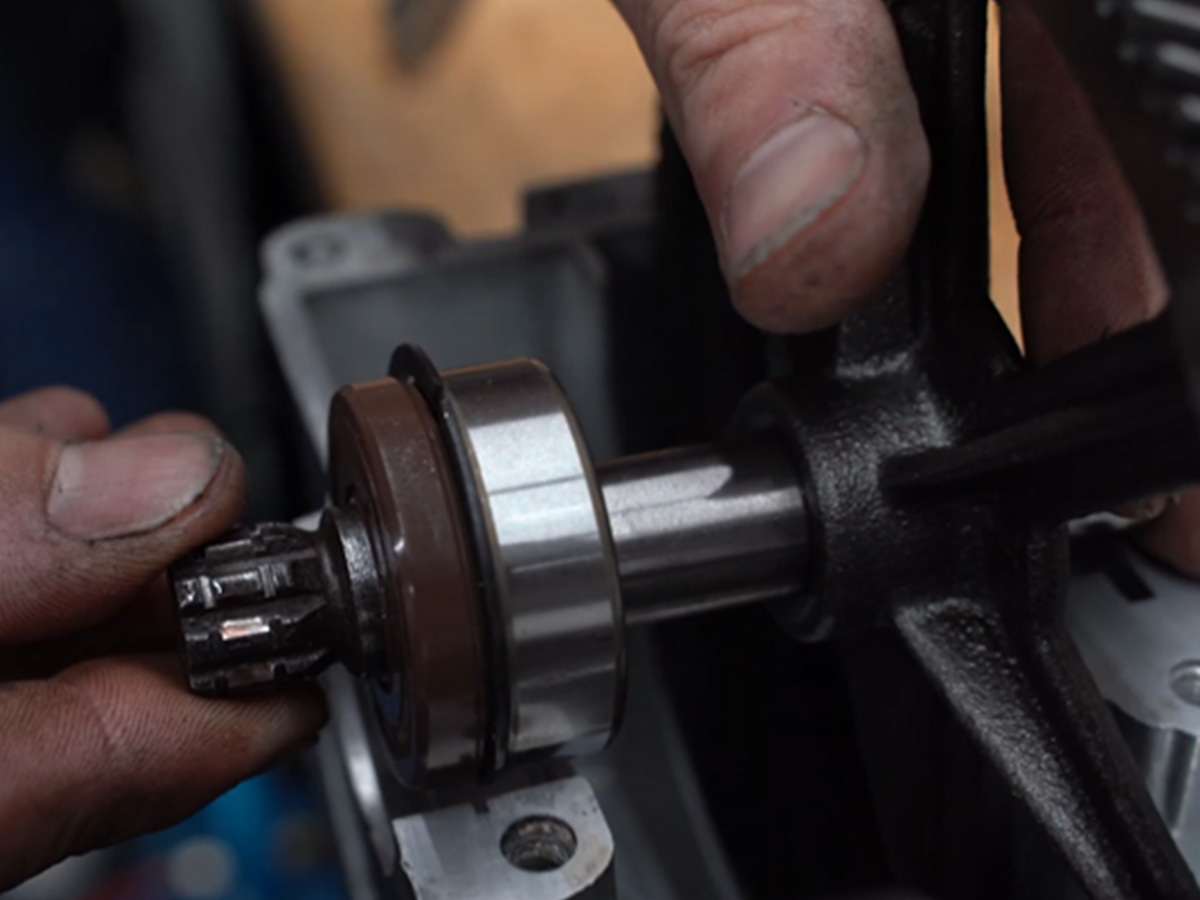
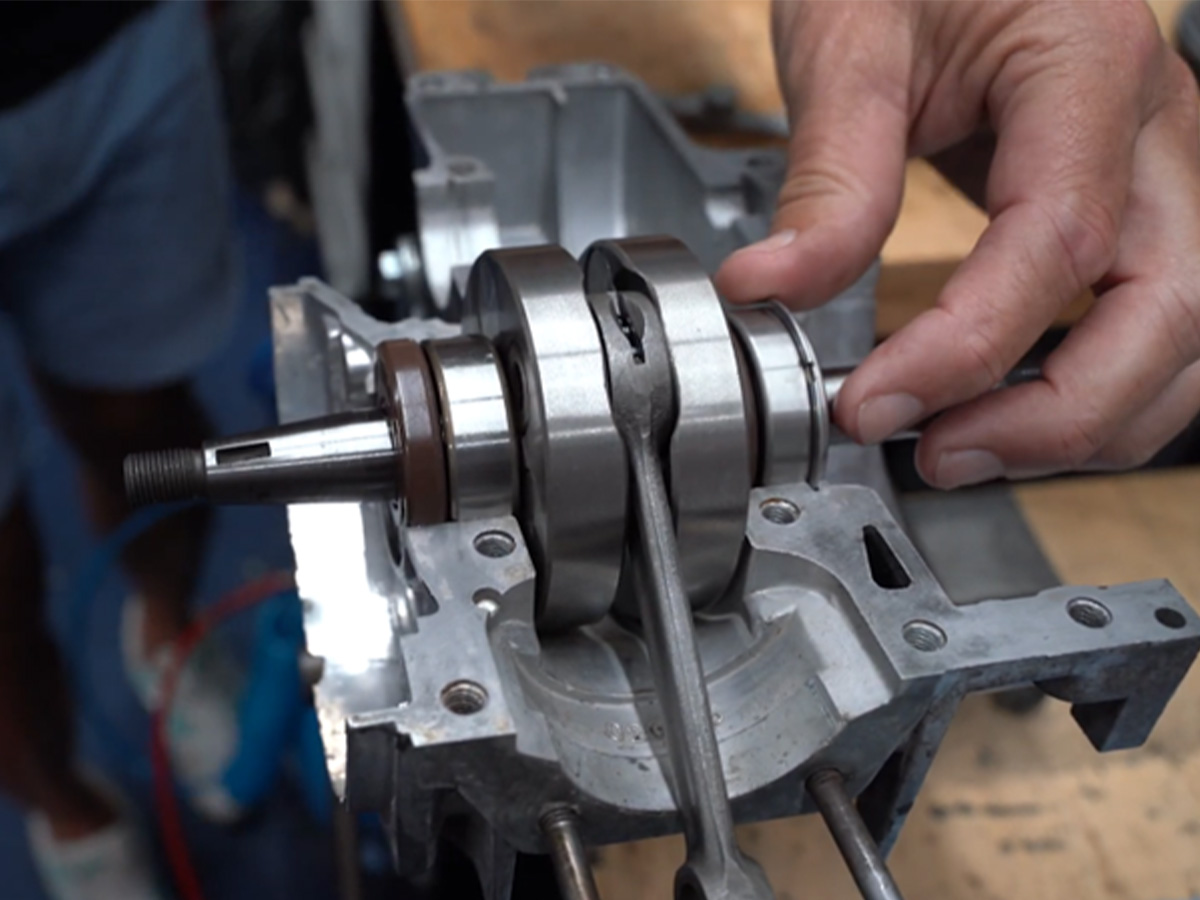
Step 5: Installing the Puch E50 crankshaft
Heat the bearing slightly and slide the crankshaft into position. Support the crankshaft during installation to protect alignment. Install new circlips and install the second oil seal. Make sure the crankshaft sits centered in the crankcase.
Correct crankshaft alignment prevents vibration and seal wear.
Step 6: Lubrication before closing the engine
Lubricate the bearings and seals with two-stroke oil. Keep sealing surfaces clean and dry before applying sealant. This lubrication protects the engine during first start.
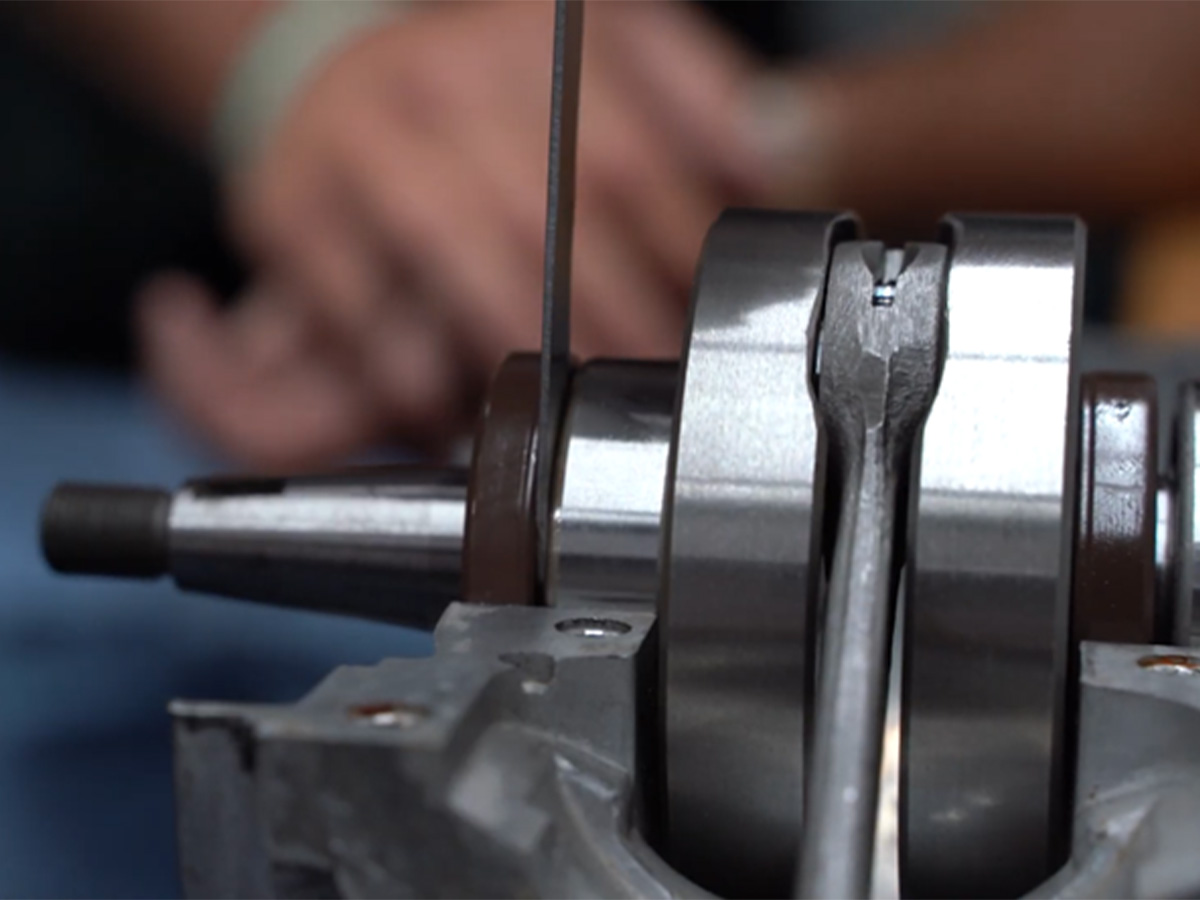
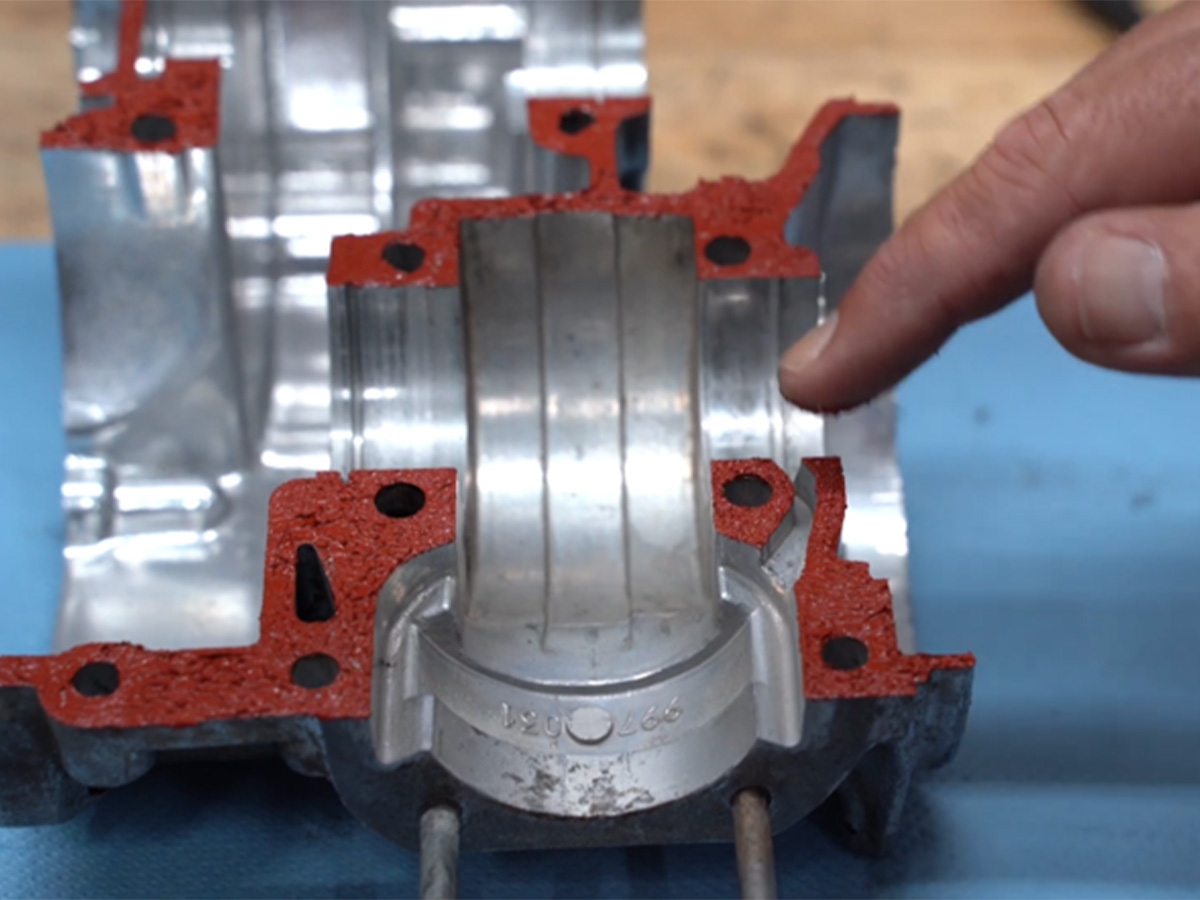
Step 7: Checking the lubrication channel
Check the lubrication channel in the crankcase. Make sure sealant does not block the channel. Correct lubrication prevents bearing damage.
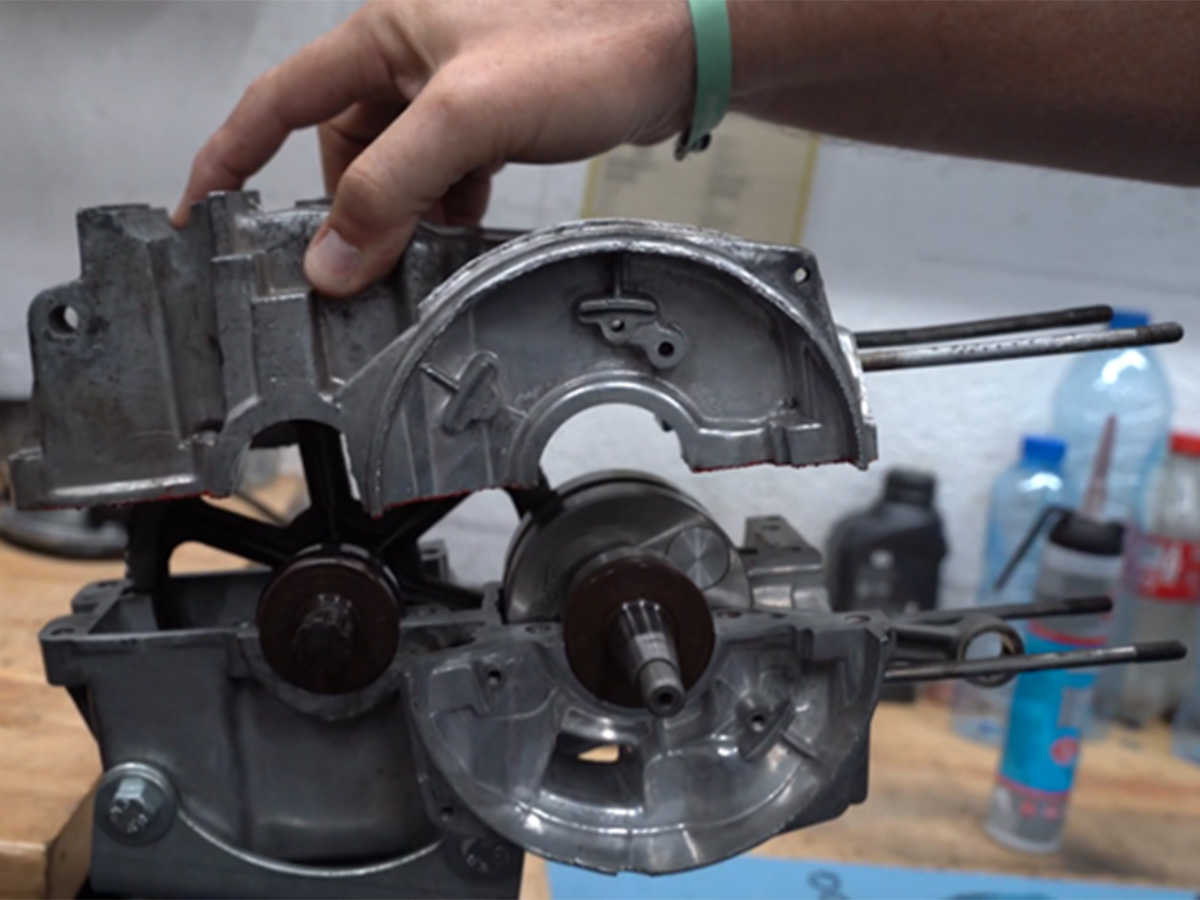
Step 8: Closing the crankcase
Apply liquid gasket evenly on the crankcase surfaces. Install bolts loosely and tighten bolts in a cross pattern. Torque the bolts to 10 Nm.
Correct torque and sealing prevent air leaks.
Step 9: Final checks
Check that the crankshaft rotates smoothly. Check that the gearbox and clutch move freely. Make sure no sealant blocks oil channels.
Step 10: Wait before installing the cylinder
Wait 24 hours before installing the cylinder. This allows the sealant to cure completely and prevents air leaks.
Puch E50 engine case restrictions for 70cc and 74cc cylinders
Some Puch E50 engine cases contain restriction pins that prevent large cylinders from fitting. Remove the restriction carefully with a file or Dremel and seal the hole if necessary. This modification allows installation of a 70cc cylinder kit or 74cc cylinder kit.
Common Puch E50 rebuild mistakes
Air leaks cause most problems after a Puch E50 rebuild. Incorrect oil seal installation, blocked oil channels, and incorrect crankshaft alignment also cause problems. Incorrect bolt torque and missing lubrication cause engine damage.
Correct installation and correct sealing prevent these problems.
How to recognize air leaks in a Puch E50 engine
Air leaks cause high idle, poor starting, overheating, and power loss. Common air leak locations include crankshaft seals, cylinder base gasket, carburetor connection, and crankcase sealing surfaces.
Fixing air leaks restores correct engine performance.
After rebuilding a Puch E50 engine
Adjust the carburetor and check ignition timing after the rebuild. Use a slightly richer fuel mixture during the first kilometers. Perform a careful engine break-in period. Check compression and check for air leaks after the first rides.
Correct tuning and break-in ensure long engine life.
FAQ: Rebuilding a Puch E50 engine
How do I rebuild a Puch E50 engine?
Disassemble the engine, replace bearings and seals, clean parts, install the crankshaft, seal the crankcase, and torque bolts correctly.
What parts should I replace during a Puch E50 rebuild?
Replace bearings, oil seals, circlips, gaskets, and worn parts. Replace the crankshaft if it has play.
How do you install Puch E50 bearings?
Heat bearings to 100–110°C before installation.
How should Puch E50 oil seals be installed?
Install seals with the open side facing inward and lubricate before installation.
Why does my Puch E50 engine have air leaks after rebuild?
Air leaks are caused by bad seals, bad sealing surfaces, or blocked oil channels.
How long should sealant cure before installing the cylinder?
Wait 24 hours before installing the cylinder.
Conclusion: Rebuilding a Puch E50 engine
Rebuilding a Puch E50 engine requires correct tools, correct parts, and precise assembly. Correct bearing installation, correct oil seal installation, correct crankshaft alignment, and correct crankcase sealing ensure a reliable engine.
Order your Puch E50 rebuild kit, crankshaft, bearings, oil seals, and tools at PuchShop and start rebuilding your Puch E50 engine today.


-230x173.jpg "Circlip plier tool set 4-pieces")


